こんにちは、もしくはこんばんは。シロです!
model-viewerは、Web上で簡単に3Dモデルを表示できるJavaScriptライブラリです。
しかし、残念ながら具体的な使いかたのドキュメントが少なく、調べるのに苦労したので自分でまとめることにしました!
この記事では、Webページ上で3Dモデルのアニメーションを再生するAnimationのAPIについて、検証した結果も含めて解説していきます。

Attributes:属性
animation-name
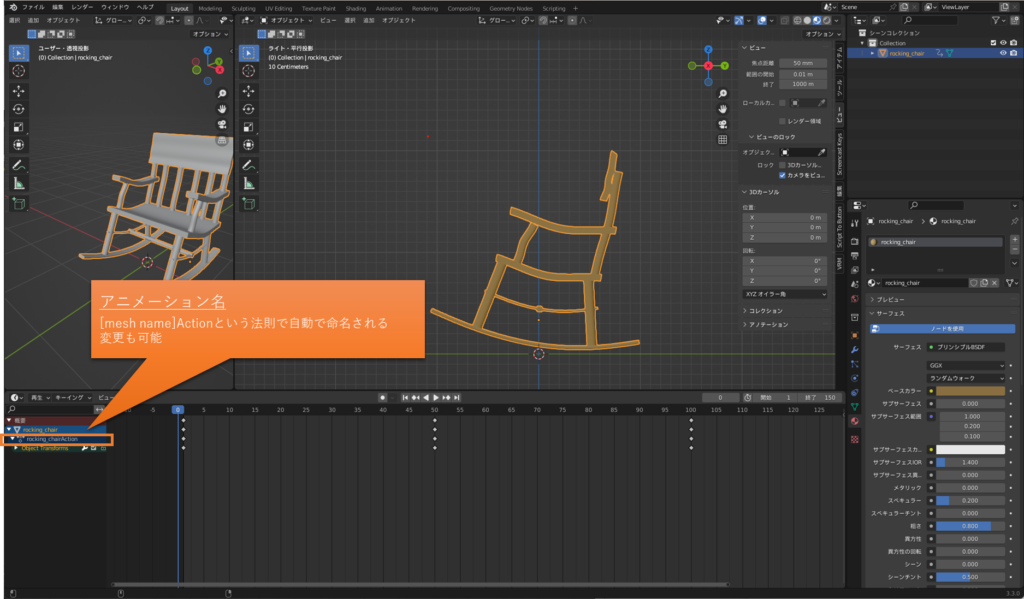
animation-name属性には、再生するアニメーション名を設定します。
animation-nameを設定しない場合は、3Dモデルデータ内で最初に見つかったアニメーションが再生されます。
<model-viewer src="path/to/model.gltf" animation-name="animationName"></model-viewer>animation-nameはBlenderのタイムラインウィンドウで確認できます。概要欄は左端の>をクリックで表示。

animation-crossfade-duration
animation-crossfade-duration属性は、アニメーション間のクロスフェード時間を指定できます。
クロスフェード時間とは、一つのアニメーションから別のアニメーションに移行するときに、どのくらいの時間をかけて滑らかに移行するかを指定する時間のことです。
この属性を指定することで、アニメーションの切り替わりがスムーズになります。
アニメーションの切り替えのクロスフェード時間ですが、現状の<model-viewer>は複数のアニメーションを指定することができません。
複数アニメーションを持つモデルで検証もしてみましたが、いまいち動作がわかりませんでした。
autoplay
autoplay属性を設定すると、3Dモデルを表示した時点でアニメーションを自動再生することができます。
なお、animation-nameが設定されていない場合は、一番最初に見つかったアニメーションが再生されます。
<model-viewer src="path/to/model.gltf" autoplay></model-viewer>Properties:プロパティ
availableAnimations
availableAnimationsプロパティは、3Dモデルに含まれるアニメーションの一覧を、文字列の配列で取得できます。
availableAnimationsプロパティで取得したアニメーション名を、animation-name属性に設定することで、再生するアニメーションを指定することができます。
この例では、3Dモデルのロードが完了したときにアニメーションの一覧をコンソールに出力しています。
<model-viewer src="path/to/model.gltf" autoplay></model-viewer>
<script>
const modelViewer = document.querySelector("model-viewer");
modelViewer.addEventListener('load', (event) => {
  console.log(modelViewer.availableAnimations)
});
</script>
currentTime
currentTimeプロパティは、再生中のアニメーションの現在時間(秒単位)を取得できます。
書き換え可能で、currentTimeを書き換えることで指定の時間位置からアニメーションを再生することができます。
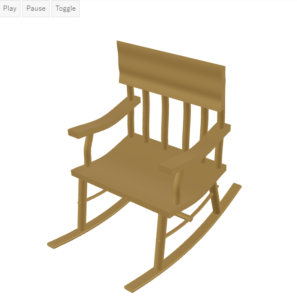
この例では、時刻を0秒に指定してアニメーションをリセットするボタン、5秒ごとにアニメーションをスキップするボタンを作成しています。
<model-viewer src="path/to/model.gltf" autoplay>
  <div class="controls" ,="">
    <button id="animation_reset">Reset</button>
    <button id="animation_skip">Skip</button>
  </div>
</model-viewer>
<script>
const modelViewer = document.querySelector("model-viewer");

document.querySelector('#animation_reset').addEventListener('click', (event) => {
  modelViewerAnimationSample.currentTime = 0
});

document.querySelector('#animation_skip').addEventListener('click', (event) => {
  modelViewerAnimationSample.currentTime += 5
});
</script>
timeScale
timeScaleプロパティは、アニメーションの再生時間の倍率を設定できます。
たとえば、timeScale = 0.5を設定することでアニメーションの再生時間は半分になりゆっくり再生されます。
timeScale = 2を設定することでアニメーションの再生時間は倍速になり早く再生されます。
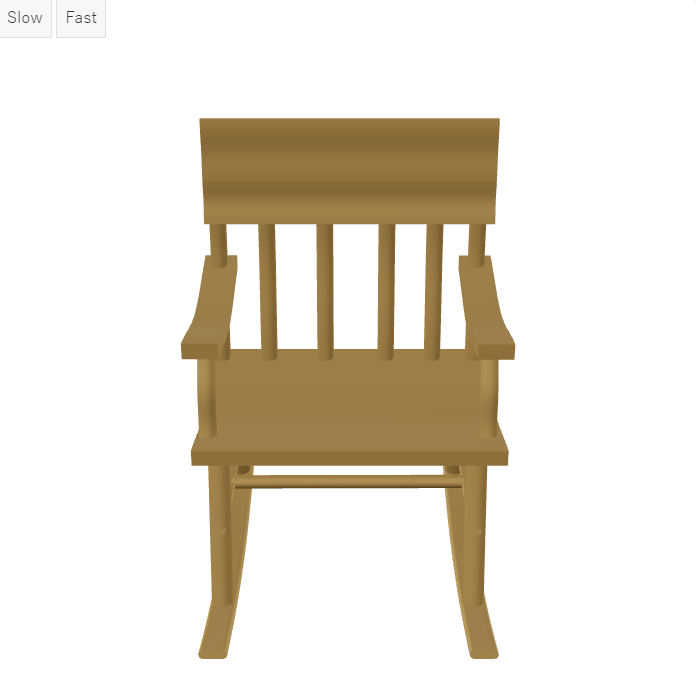
この例では、アニメーションの速度を半分の速度、倍の速度に変更するボタンを追加しています。
<model-viewer src="path/to/model.gltf" autoplay>
  <div class="controls" ,="">
    <button id="animation_slow">Slow</button>
    <button id="animation_fast">Fast</button>
  </div>
</model-viewer>
<script>
const modelViewer = document.querySelector("model-viewer");

document.querySelector('#animation_slow').addEventListener('click', (event) => {
  modelViewer.timeScale = 0.5
});

document.querySelector('#animation_fast').addEventListener('click', (event) => {
  modelViewer.timeScale = 2
});
</script>duration (読み取り専用)
durationプロパティは、現在表示されているモデルのアニメーションの総再生時間を表します。値は秒単位で表され、小数点以下の桁数を持つことができます。
このプロパティは読み取り専用であり、モデルがアニメーションを持たない場合や、読み込みが完了していない場合には0を返します。
この例では、durationプロパティの値をコンソールに出力するボタンを追加しています。
<model-viewer src="path/to/model.gltf" autoplay>
  <div class="controls" ,="">
    <button id="animation_duration">Duration</button>
  </div>
</model-viewer>
<script>
const modelViewer = document.querySelector("model-viewer");
document.querySelector('#animation_duration').addEventListener('click', (event) => {
  console.log(modelViewer.duration);
});
</script>
paused (読み取り専用)
pausedプロパティは、アニメーションの一時停止状態を取得できます。
アニメーションが再生中の場合はtrue、一時停止中の場合はfalseを返します。
この例では、pausedプロパティの状態に応じてアニメーションの再生/一時停止を切り替えるボタンを追加しています。
<model-viewer src="path/to/model.gltf" autoplay>
  <div class="controls" ,="">
    <button id="animation_toggle">Toggle</button>
  </div>
</model-viewer>
<script>
const modelViewer = document.querySelector("model-viewer");
document.querySelector('#animation_toggle').addEventListener('click', (event) => {
  if (modelViewer.paused == true) {
    modelViewer.play()
  } else {
    modelViewer.pause()
  }
});
</script>
Methods:メソッド
play(options: {repetitions, pingpong})
play()メソッドは、アニメーションを再生します。
| repetitions | ループ回数を指定します。1以上を指定すると、指定した回数分アニメーションを再生したあと、アニメーションが停止します。なお、0以下を指定した場合はアニメーションを1回再生したあと、停止します。(default:無限再生) |
| pingpong | アニメーションの再生方向を指定します。trueに設定すると、アニメーションが終了したとき(ループ時)に自動的に逆再生されます。(default:false) |
この例では、ボタンを押すとアニメーションを2回再生し、ループ時に逆方向でアニメーションを再生します。
<model-viewer src="path/to/model.gltf" animation-name="animationA">
  <button id="play">アニメーションを再生</button>
</model-viewer>
<script>
const modelViewer = document.querySelector("model-viewer");
const playButton = modelViewer.querySelector("button#play");
playButton.addEventListener('click', ()=>{
  modelViewer.play({repetitions:2, pingpong:true});
});
</script>このサンプルビューでは、pingpongオプションをfalse/trueで再生するボタンを追加しています。動作の違いを確認してみてください。
上のロッキングチェアのような前後を繰り返すようなアニメーションの場合、pingpong:trueを指定するとアニメーションの区切りが無くなったように見えるので、スムーズなアニメーションになります。
pause()
pause()メソッドは、アニメーションを一時停止します。
<model-viewer src="path/to/model.gltf" animation-name="animationA">
  <button id="pause">アニメーションを一時停止</button>
</model-viewer>
<script>
const modelViewer = document.querySelector("model-viewer");
const pauseButton = modelViewer.querySelector("button#pause");
pauseButton.addEventListener('click', ()=>{
  modelViewer.pause();
});
</script>
Events:イベント
play
playイベントは、アニメーションの再生開始時に発火します。
<model-viewer src="path/to/model.gltf" autoplay></model-viewer>
<script>
const modelViewer = document.querySelector("model-viewer");
modelViewer.addEventListener('play',(event) => {
  console.log('アニメーションを再生開始しました');
});
</script>
pause
pauseイベントは、アニメーションが一時停止された時に発火します。
ちなみに、アニメーションは常に一時停止状態で開始されます。
このため、アニメーション開始後にpause()メソッドを呼び出し、意図的に一時停止するまでは発火しません。
<model-viewer src="path/to/model.gltf" autoplay></model-viewer>
<script>
const modelViewer = document.querySelector("model-viewer");
modelViewer.addEventListener('pause',(event) => {
  console.log('アニメーションを一時停止しました');
});
</script>
loop
loopイベントは、アニメーションが1周し、次のループ再生が開始された時に発火します。
event.detail.countでループ回数を取得できます。
<model-viewer src="path/to/model.gltf" autoplay></model-viewer>
<script>
const modelViewer = document.querySelector("model-viewer");
modelViewer.addEventListener('loop',(event) => {
  console.log('ループ回数:', event.detail.count);
});
</script>
finished
finishedイベントは、アニメーションの再生が終了した時に発火します。
<model-viewer src="path/to/model.gltf" autoplay></model-viewer>
<script>
const modelViewer = document.querySelector("model-viewer");
modelViewer.addEventListener('finished',(event) => {
  console.log('アニメーションの再生が終了しました');
});
</script>
まとめ
この記事では、<model-viewer>のAnimation APIについて解説しました。
<model-viewer>は複数のアニメーションに対応しておらず、複雑なアニメーション表現は苦手です。
しかし、上述したAPIを使いこなせれば、アイディア次第でより魅力的な3Dコンテンツが作成できるはずです!
ぜひ魅力的な3Dコンテンツに創作していきましょう!
以上、「【model-viewer】Animation APIの解説」でした。

